GCP Connection
Ennote goes beyond traditional secret management by offering a seamless and secure integration with the Google Cloud Platform (GCP). This isn't just a simple API link; it's a foundational connection that leverages GCP's native security services, including Cloud Key Management Service (KMS).
Setting up the GCP Service account
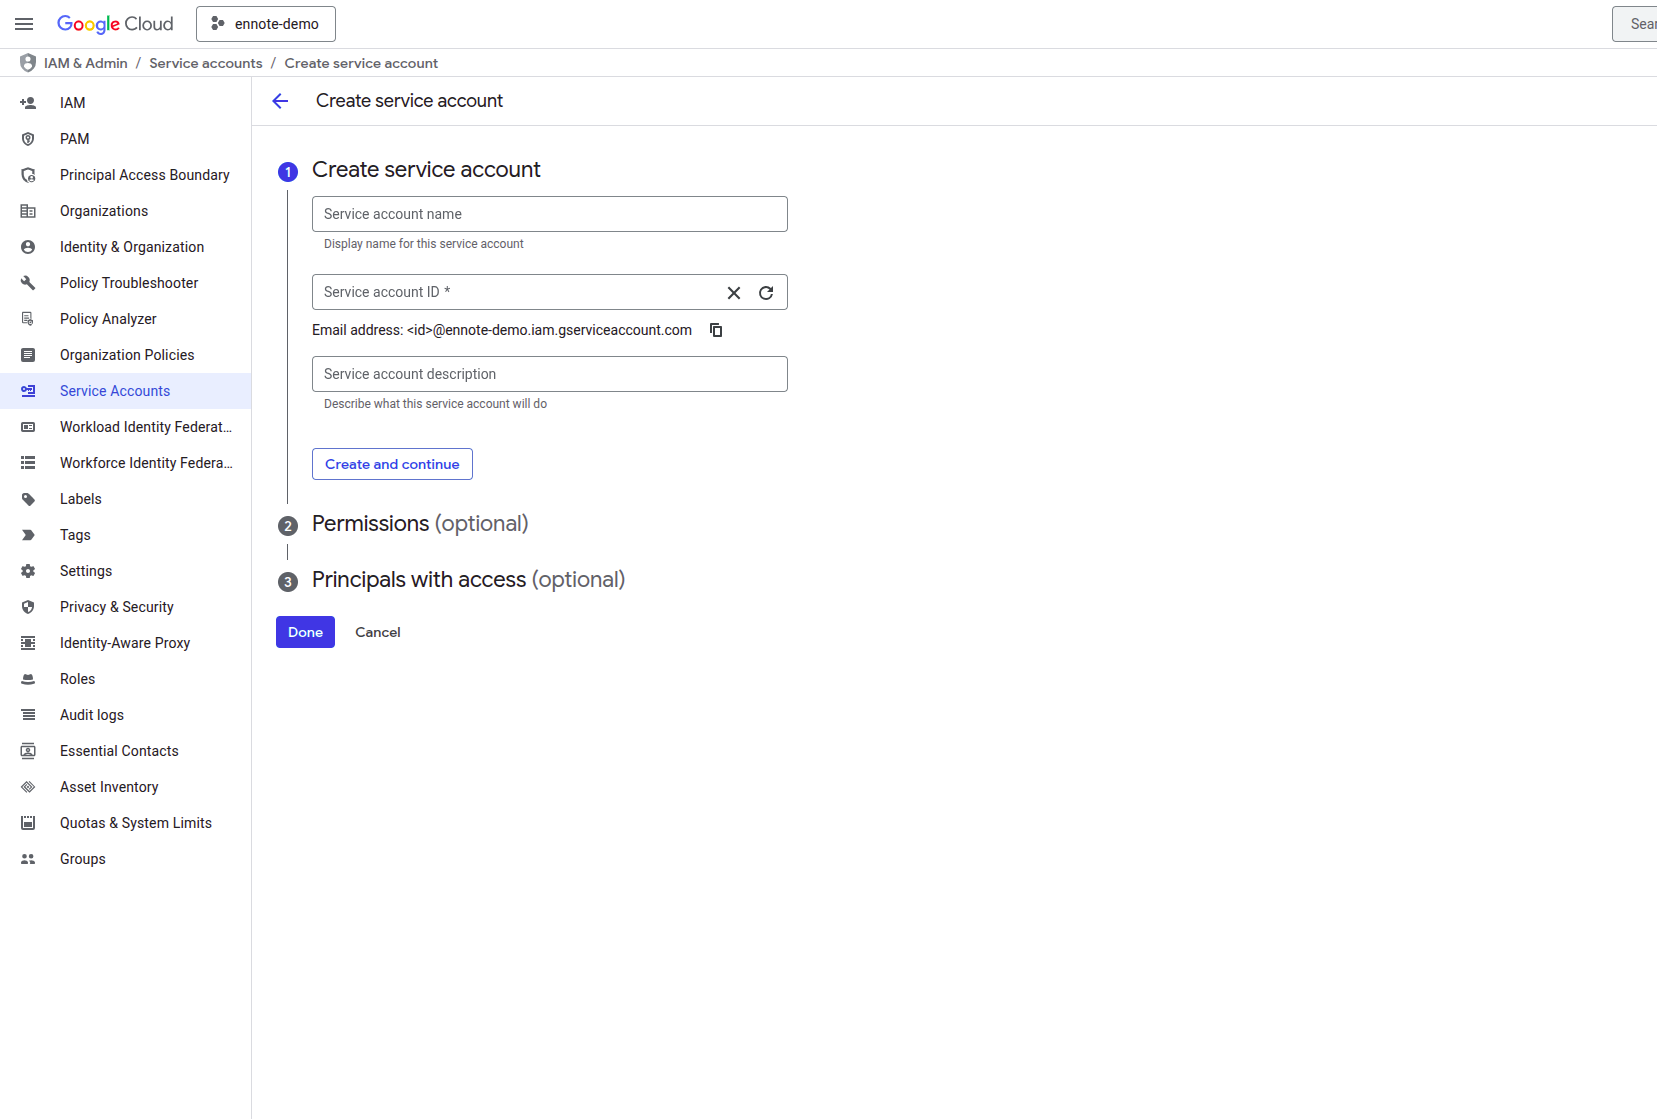
Create a new service account with any name
Configuring the Ennote-GCP Connection
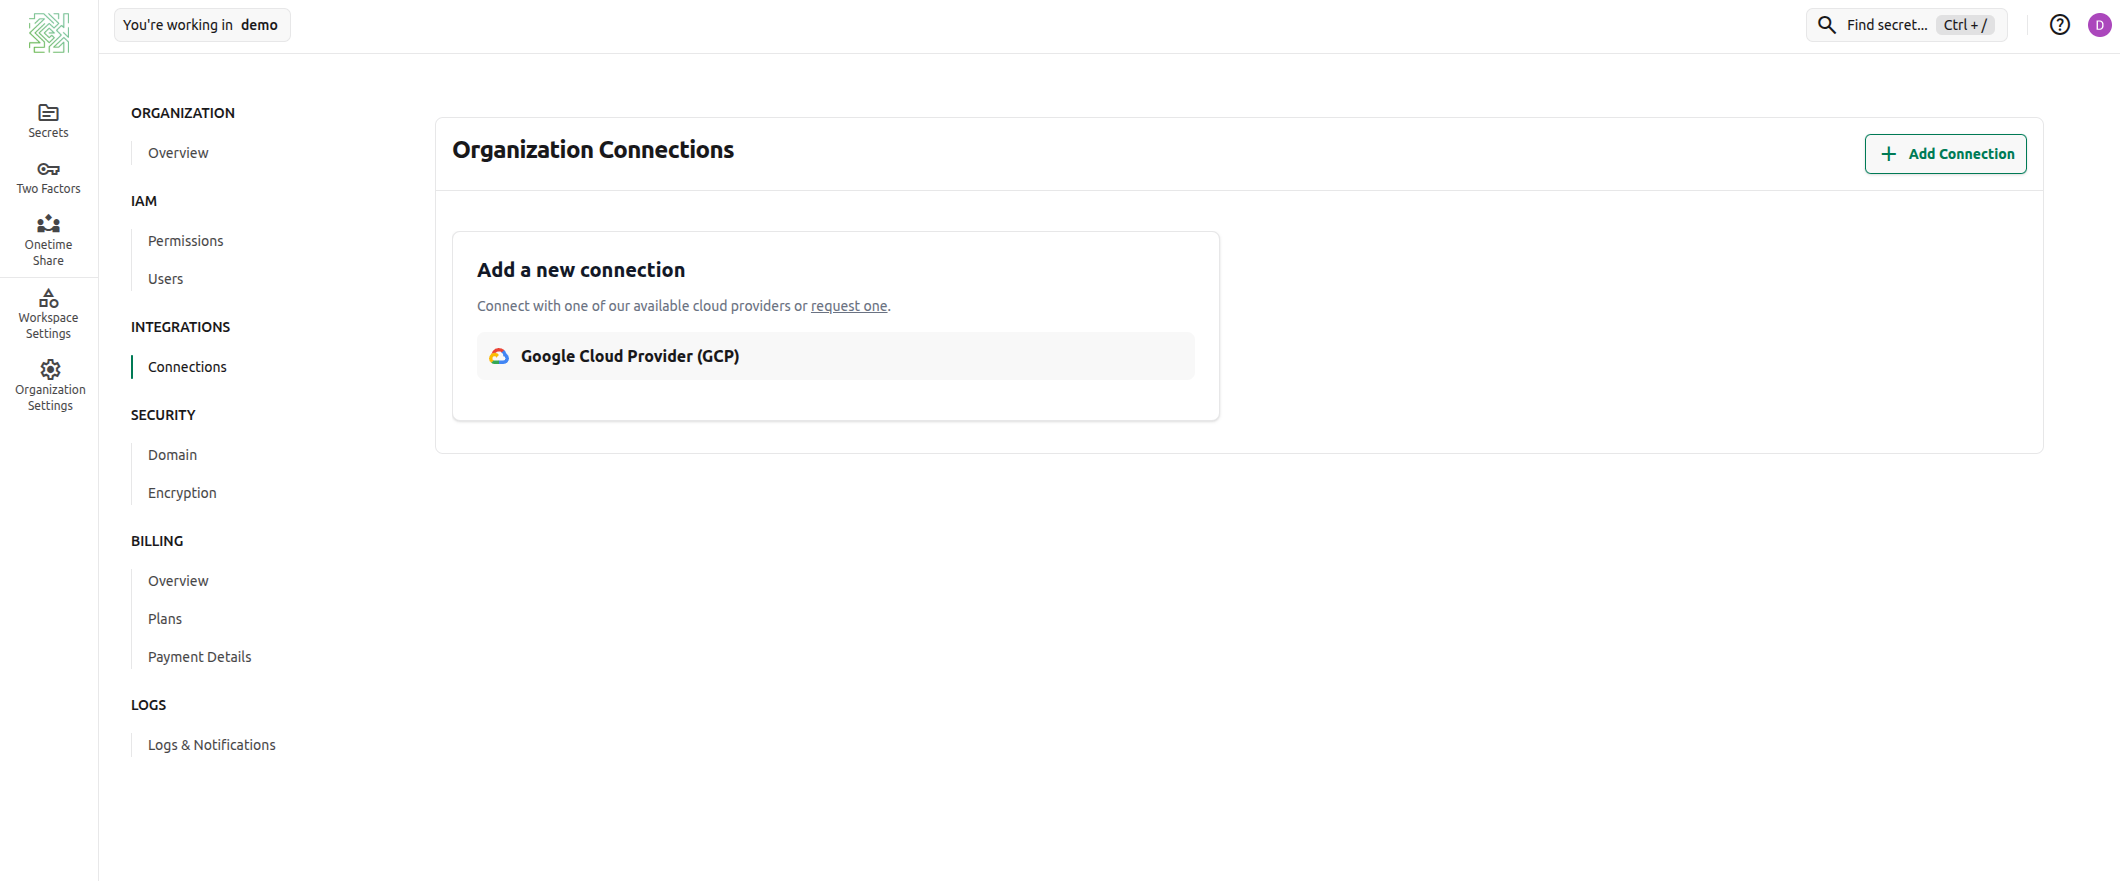
Add a new GCP connection
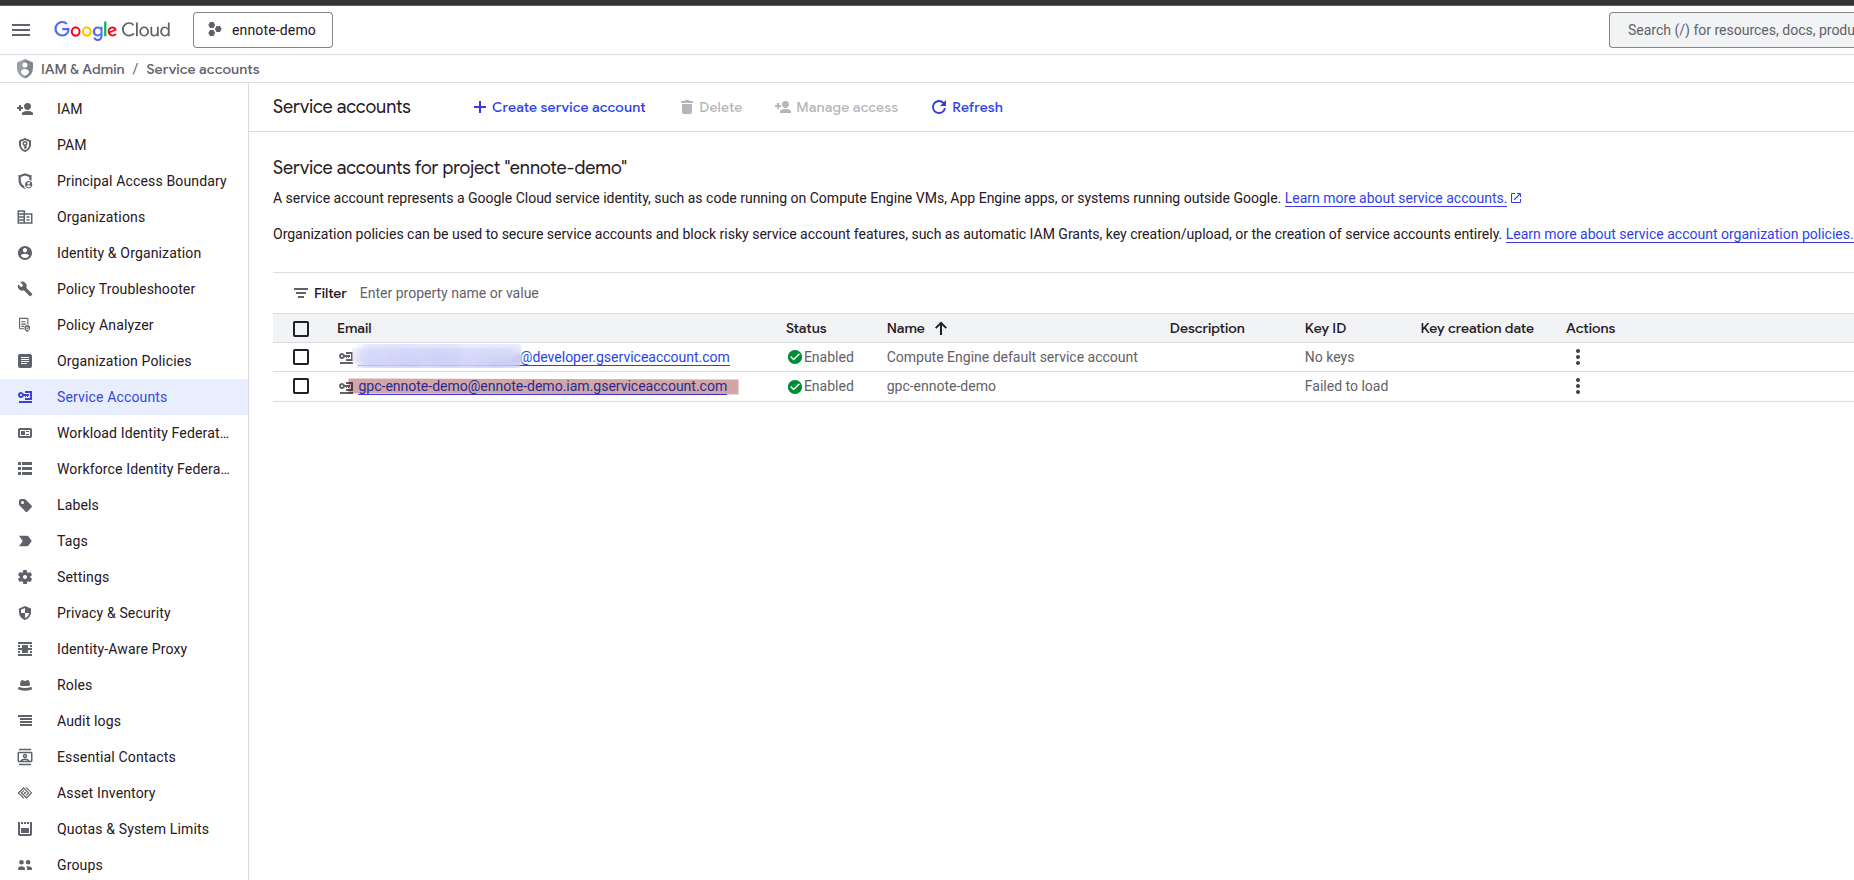
Copy Service Account email
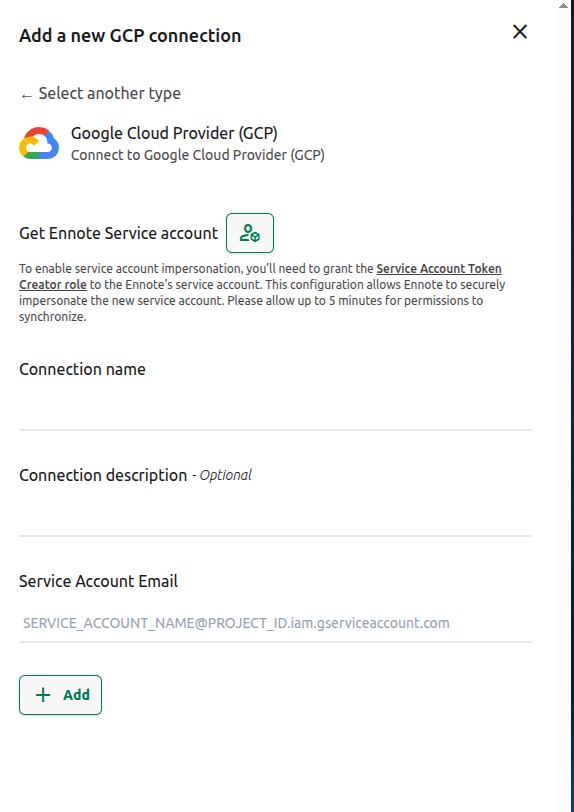
Enable Service Account Impersonation
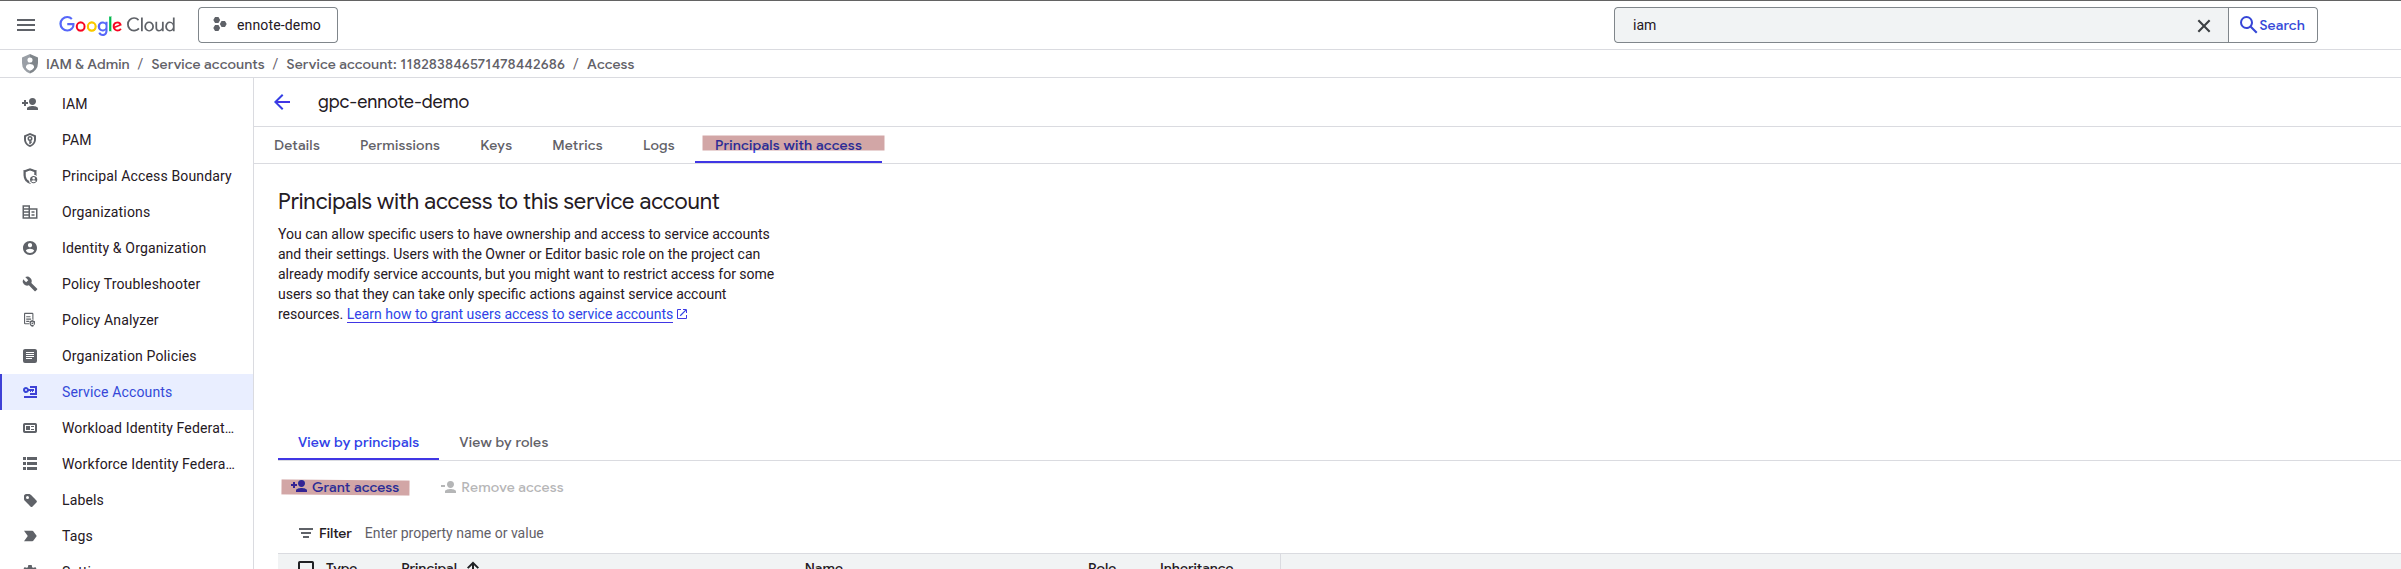
- Navigate to GCP Console -> IAM & Admin -> Service accounts.
- Select the newly created service account.
- Click on the “Principals with access” tab.
- Click “Grant Access” to add a new principal.
- To finalize the secure connection, you must grant the Service Account Token Creator role to the Ennote service account you just created. This critical permission allows the Ennote service account to impersonate your GCP service account, thereby giving it the authority to manage keys and secrets as defined by your IAM policy.
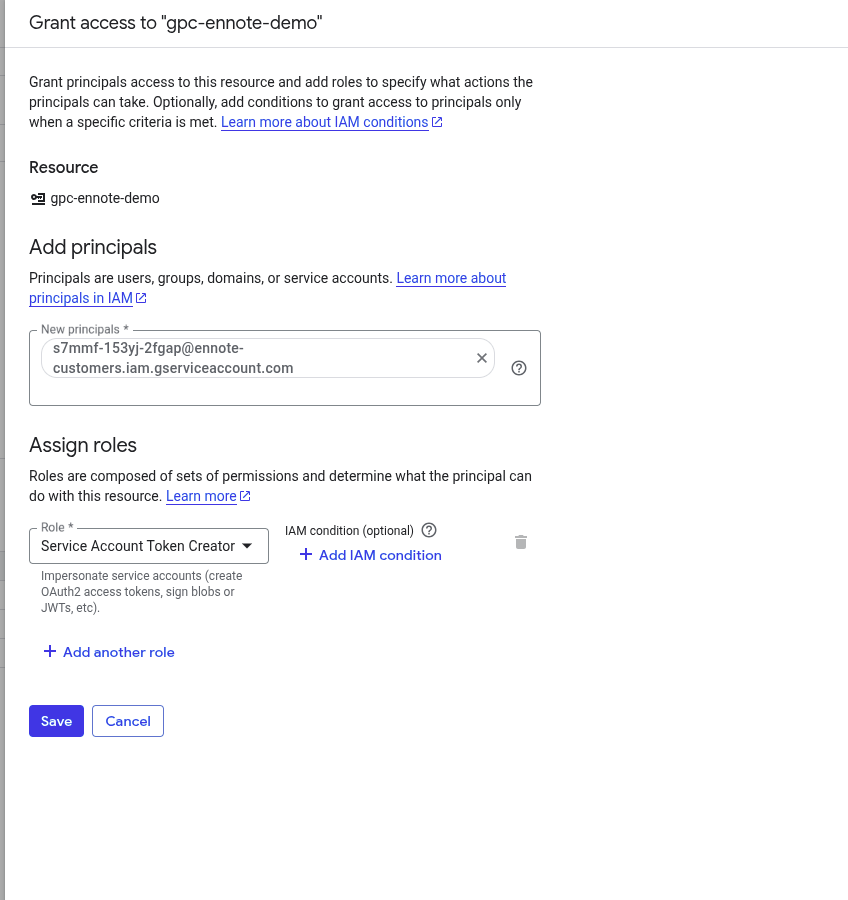
- Click “Save” to add permission.
- Connection Name:A unique and descriptive name for this integration
- Connection Description (Optional):Provide additional context for this connection, such as its purpose or the specific GCP project it links to.
- Service Account Email:This is the service account ID (email address) you saved from your GCP console in the initial setup step.
- Note: Please be aware that it can take up to five minutes for Google Cloud Platform to fully apply the new IAM permissions. If you encounter any issues during the connection process, we recommend waiting a few minutes and then trying again.
- Click “Add” to add connection.
Connection Created
Your GCP Connection is now active and ready to use. You have successfully established a secure and reliable link between Ennote and your Google Cloud Platform project. You can now proceed to leverage this connection for all your key management and secret management needs within Ennote.
Need Help?
If you encounter any issues or have questions, don’t hesitate to contact support. Our team is here to assist you with any challenges you might face.
© 2026 Ennote.io. All Rights Reserved.